
Strum Fix Plus Riffmaster Installation
REVISED: July 18, 2024
These instructions describe the procedure for installing a Byte Arts Strum Fix Plus (any version except the SFP3) in a PDP Riffmaster guitar. The procedure is similar to installing a Strum Fix Plus in any other Rock Band guitar but does require a special adapter (the RFMA) which you can purchase from ByteArts.com or if you have a 3D printer you can download the files and print your own.
NOTE: The Strum Fix Plus 3 (SFP3) can be installed in a Riffmaster but it requires a bit of filing on the guitar to make room for the larger switches on the SFP3. This is not covered in these instructions (yet).
There is also a Reddit thread about this which may be helpful: How to install a strumfix in the Riffmaster. : r/Rockband
Tools Required:
Small Phillips screwdriver
Small flat-blade screwdriver
Knife or wire cutters
Step 1 - Open up the guitar body
To open up the guitar body you will need to remove all the screws on the back of the body, and also pry off the pickguard and remove the screws that are underneath it.
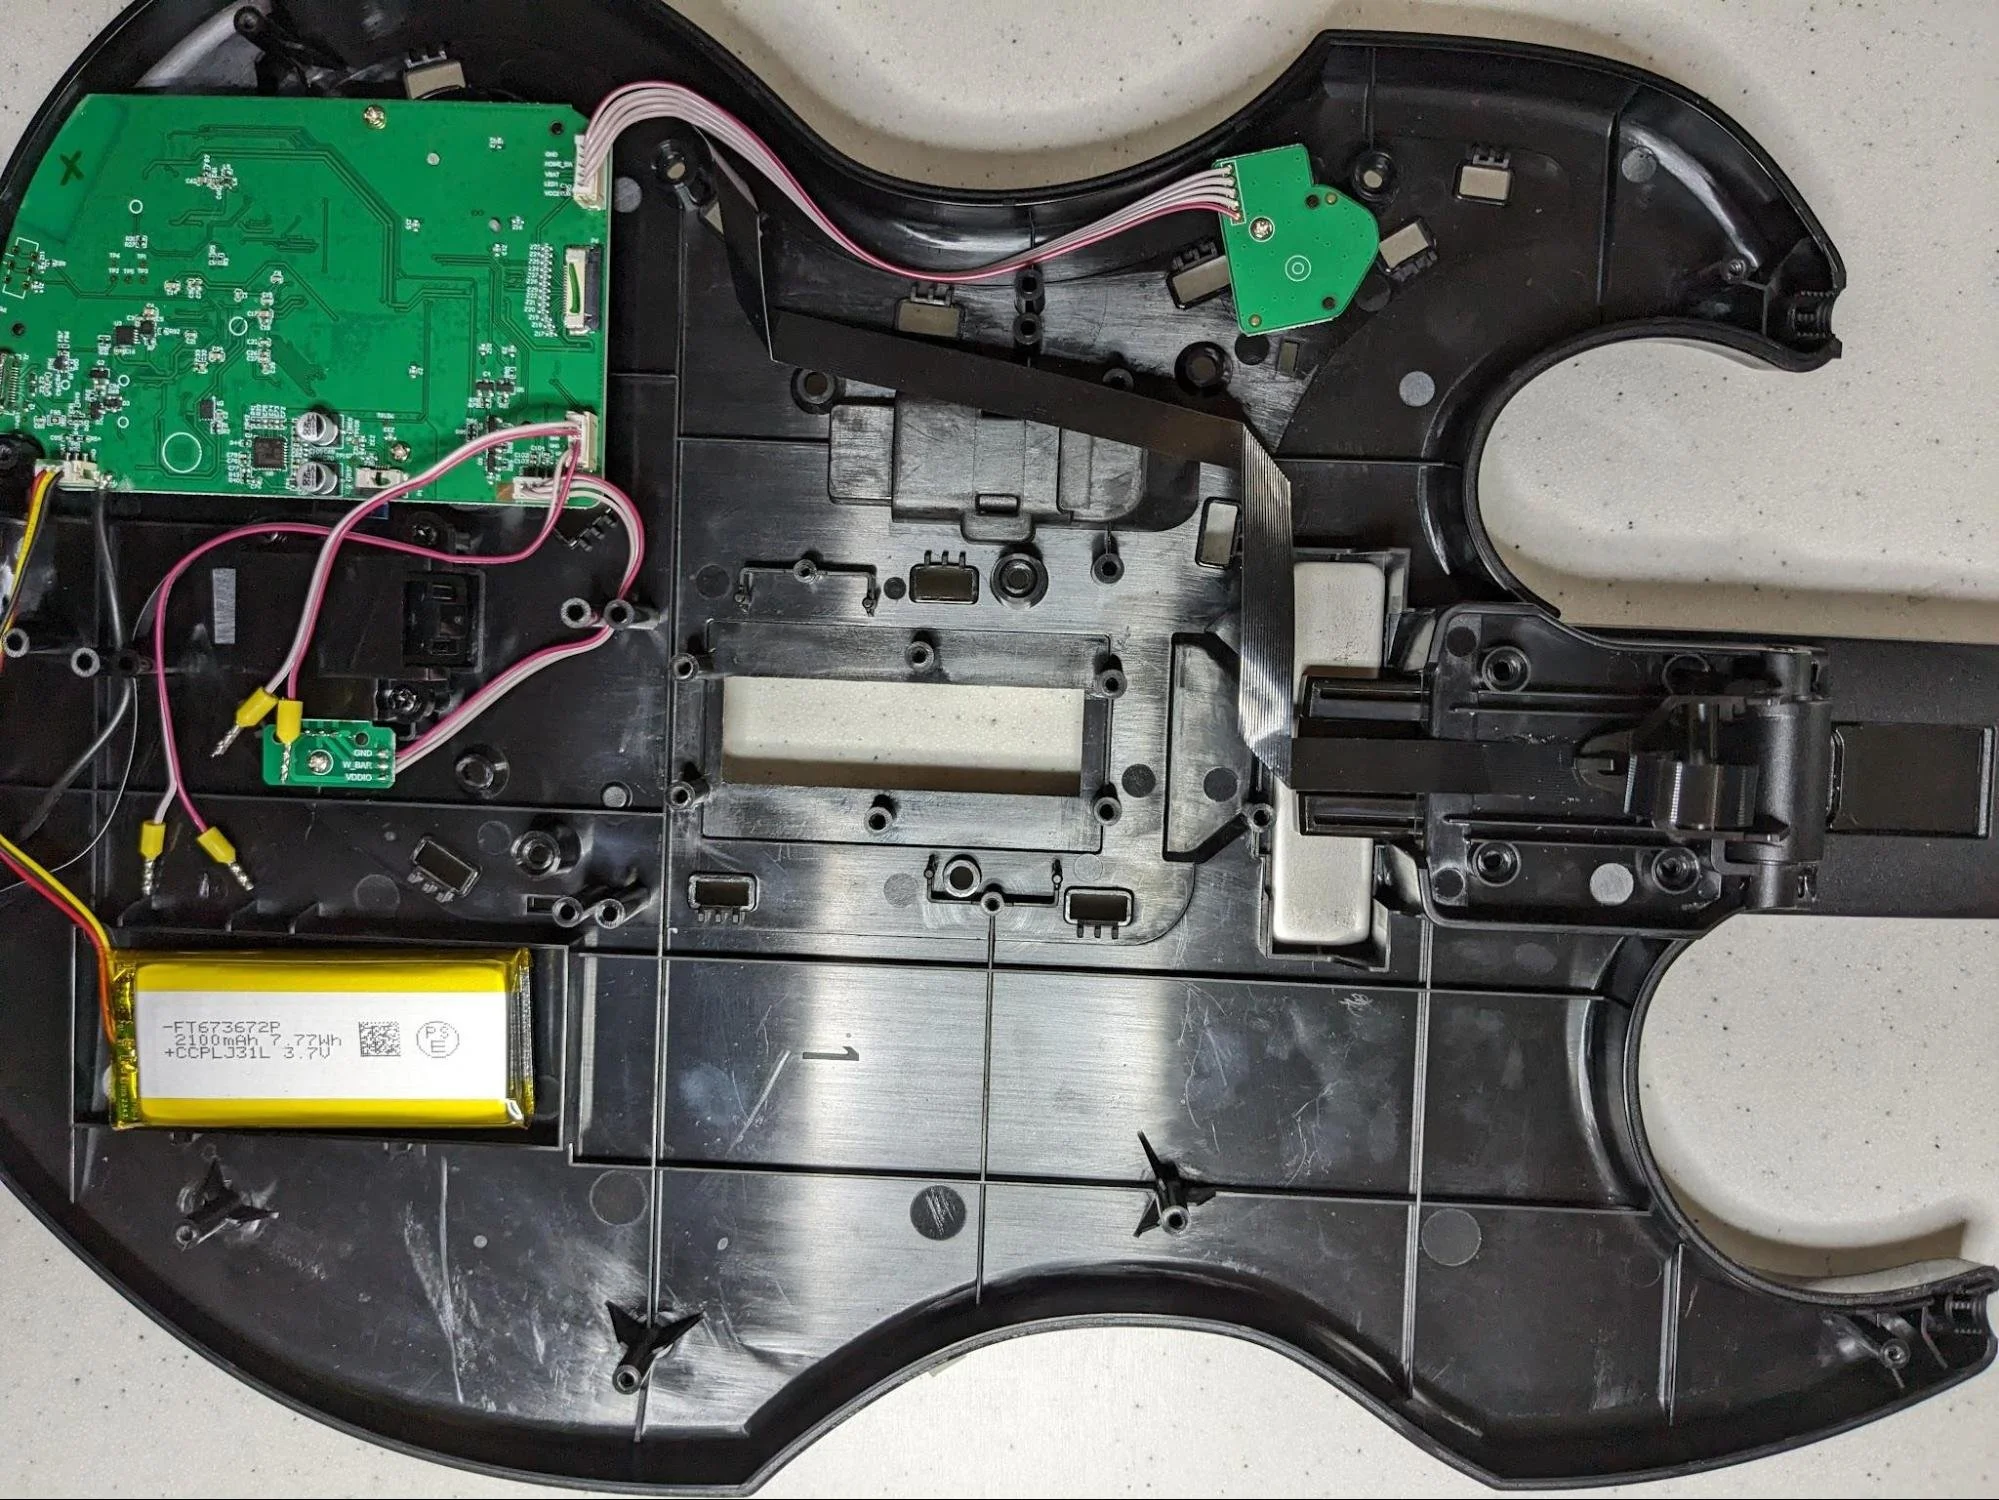
Once all the screws are removed, separate the two halves of the guitar body to expose the strummer assembly:
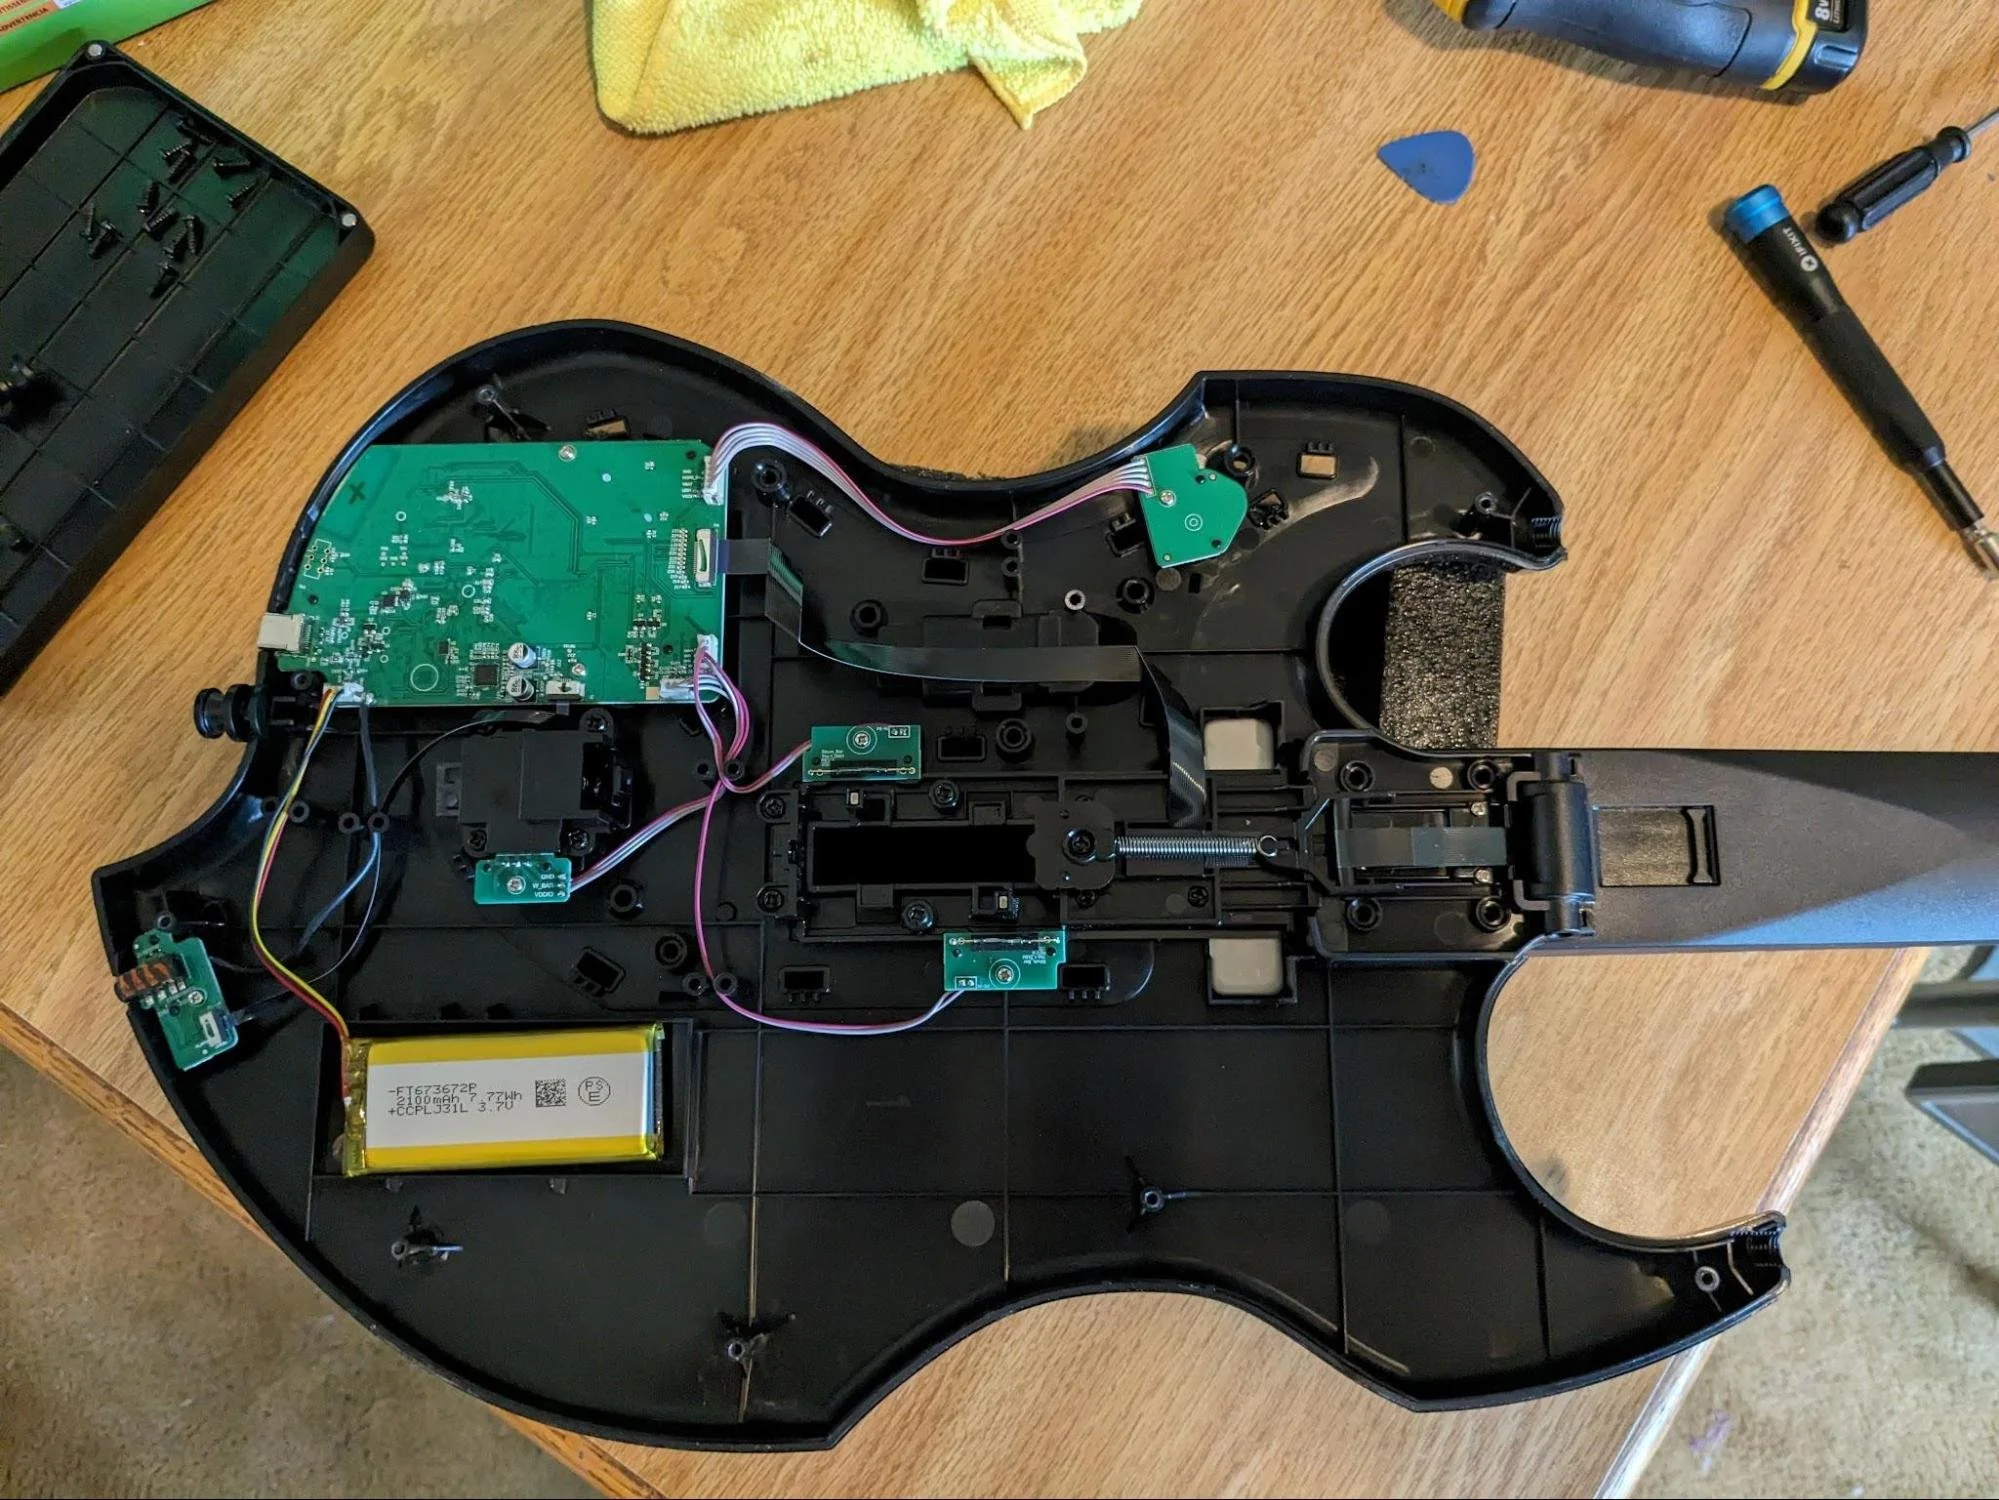
Step 2 - Remove original strummer
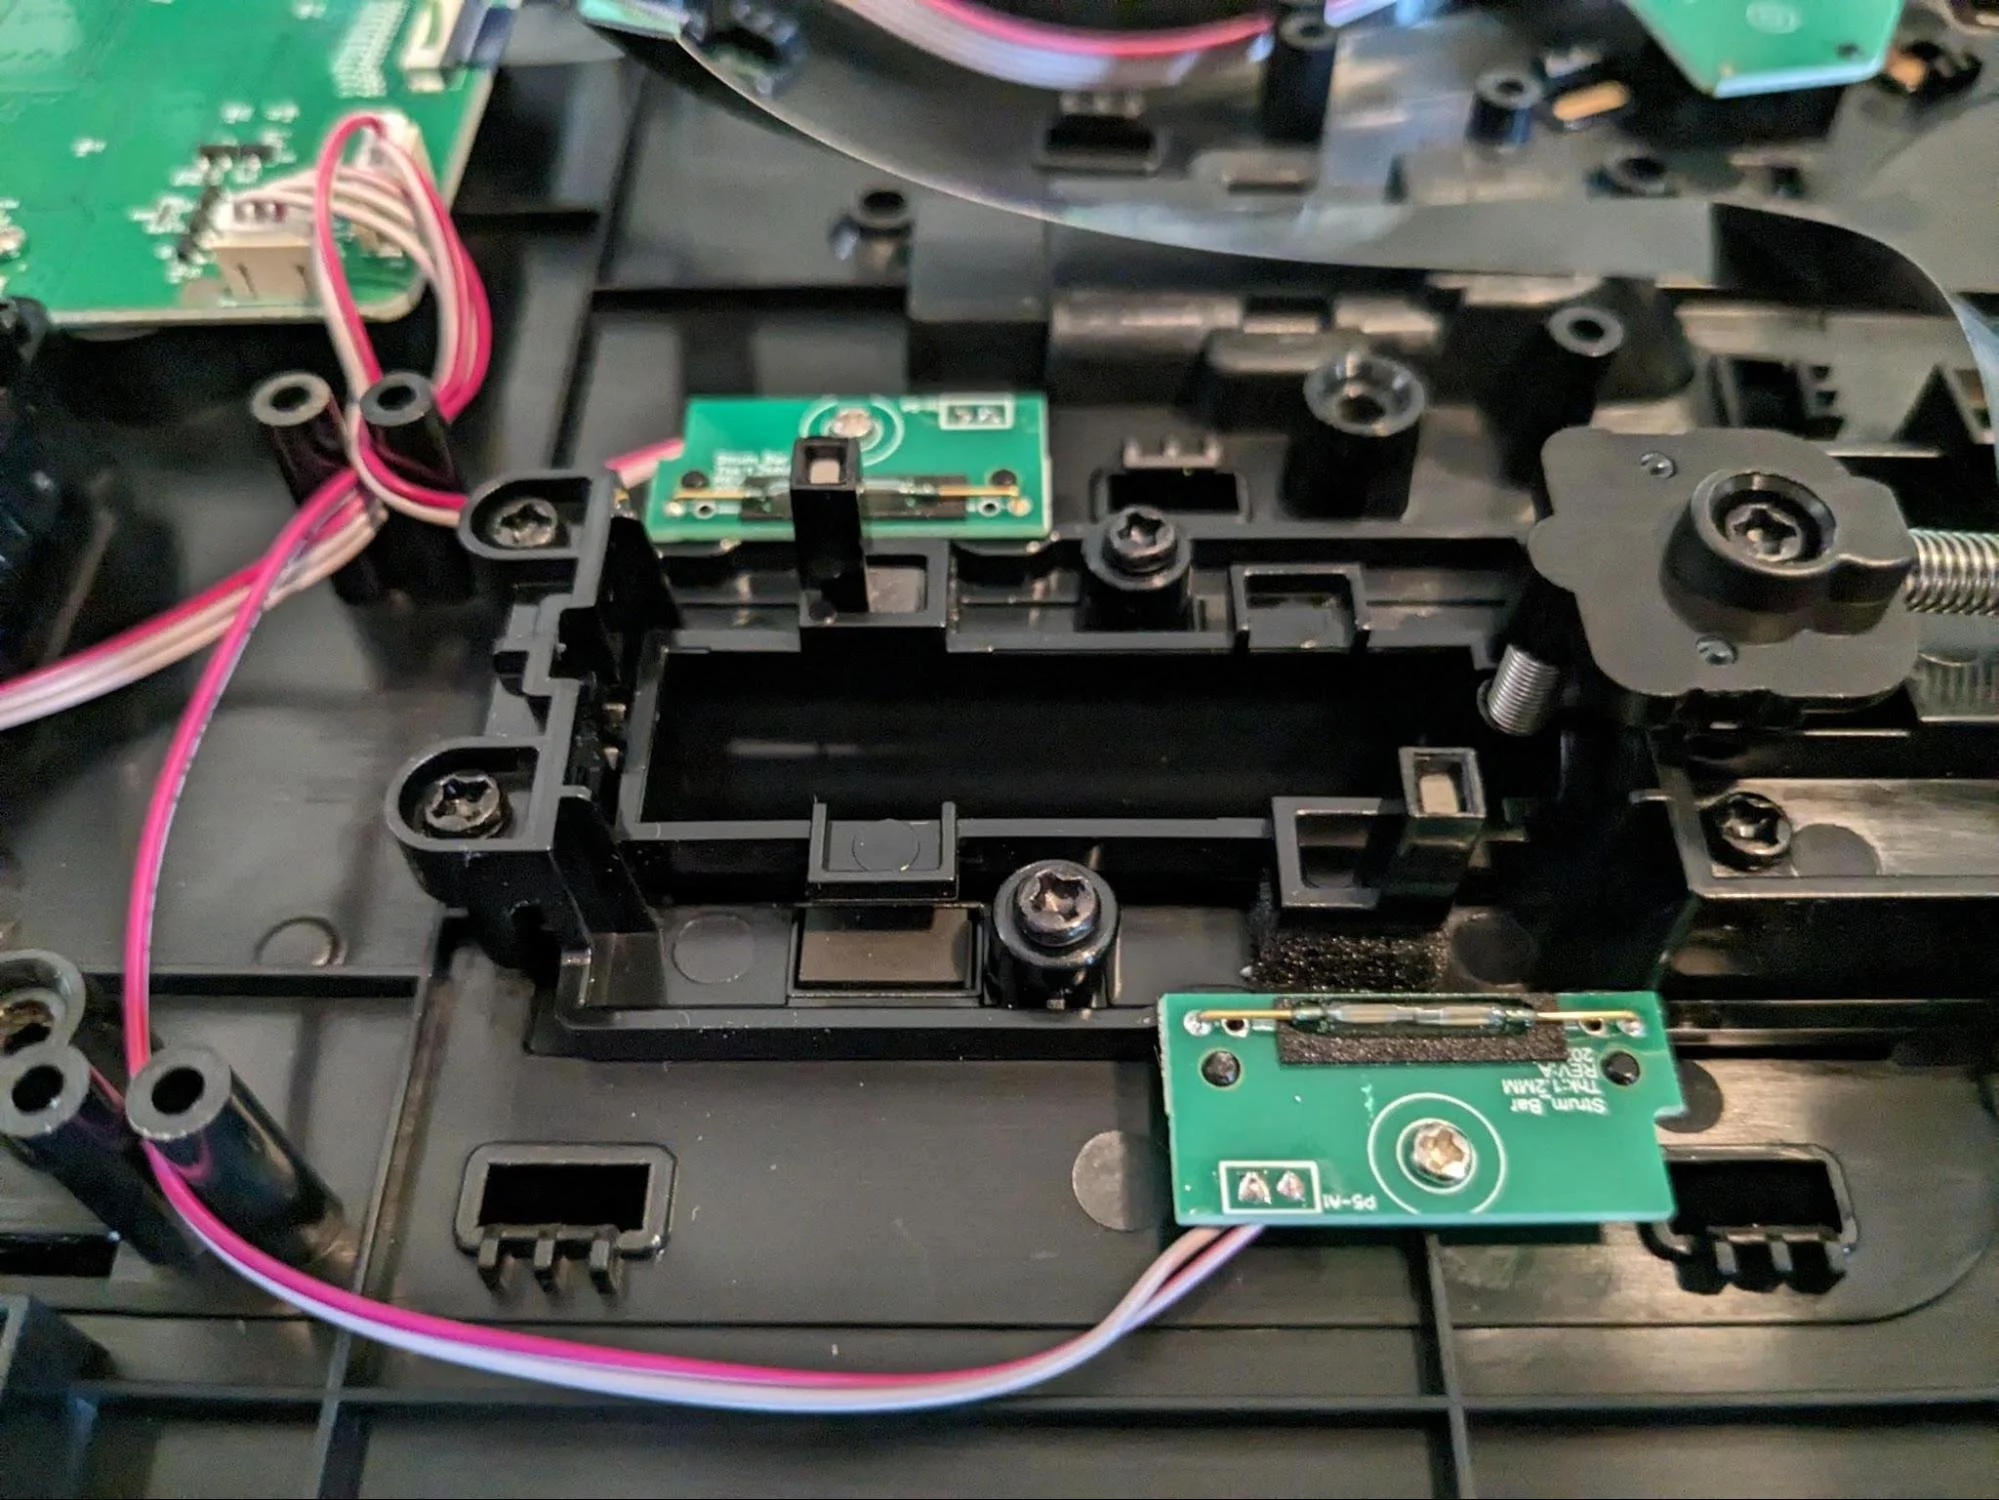
The original strummer is mounted in a bracket which also includes a mechanism for holding the fret/neck ribbon cable in place while folding the guitar neck. You will need to remove all of the bracket pieces, but be sure to keep all the screws and the spring that provides tension on the ribbon cable folding mechanism.
You will also need to remove the two small green PCBs that are mounted next to the strummer and will also need to cut the wires that go to these PCBs - cut them as close to the PCBs as possible.
You can keep the ribbon cable connected to the motherboard but be careful to not damage it. It does have a “fold” in it to bend it 90 degrees where it goes through the strummer bracket – keep the fold in it as it will fit into the Riffmaster adapter bracket (the RFMA).
NOTE: On some early versions of the Riffmaster the ribbon cable is “captive” and goes through a slot in the bracket, so you will have to disconnect one end of the cable in order to remove the bracket.
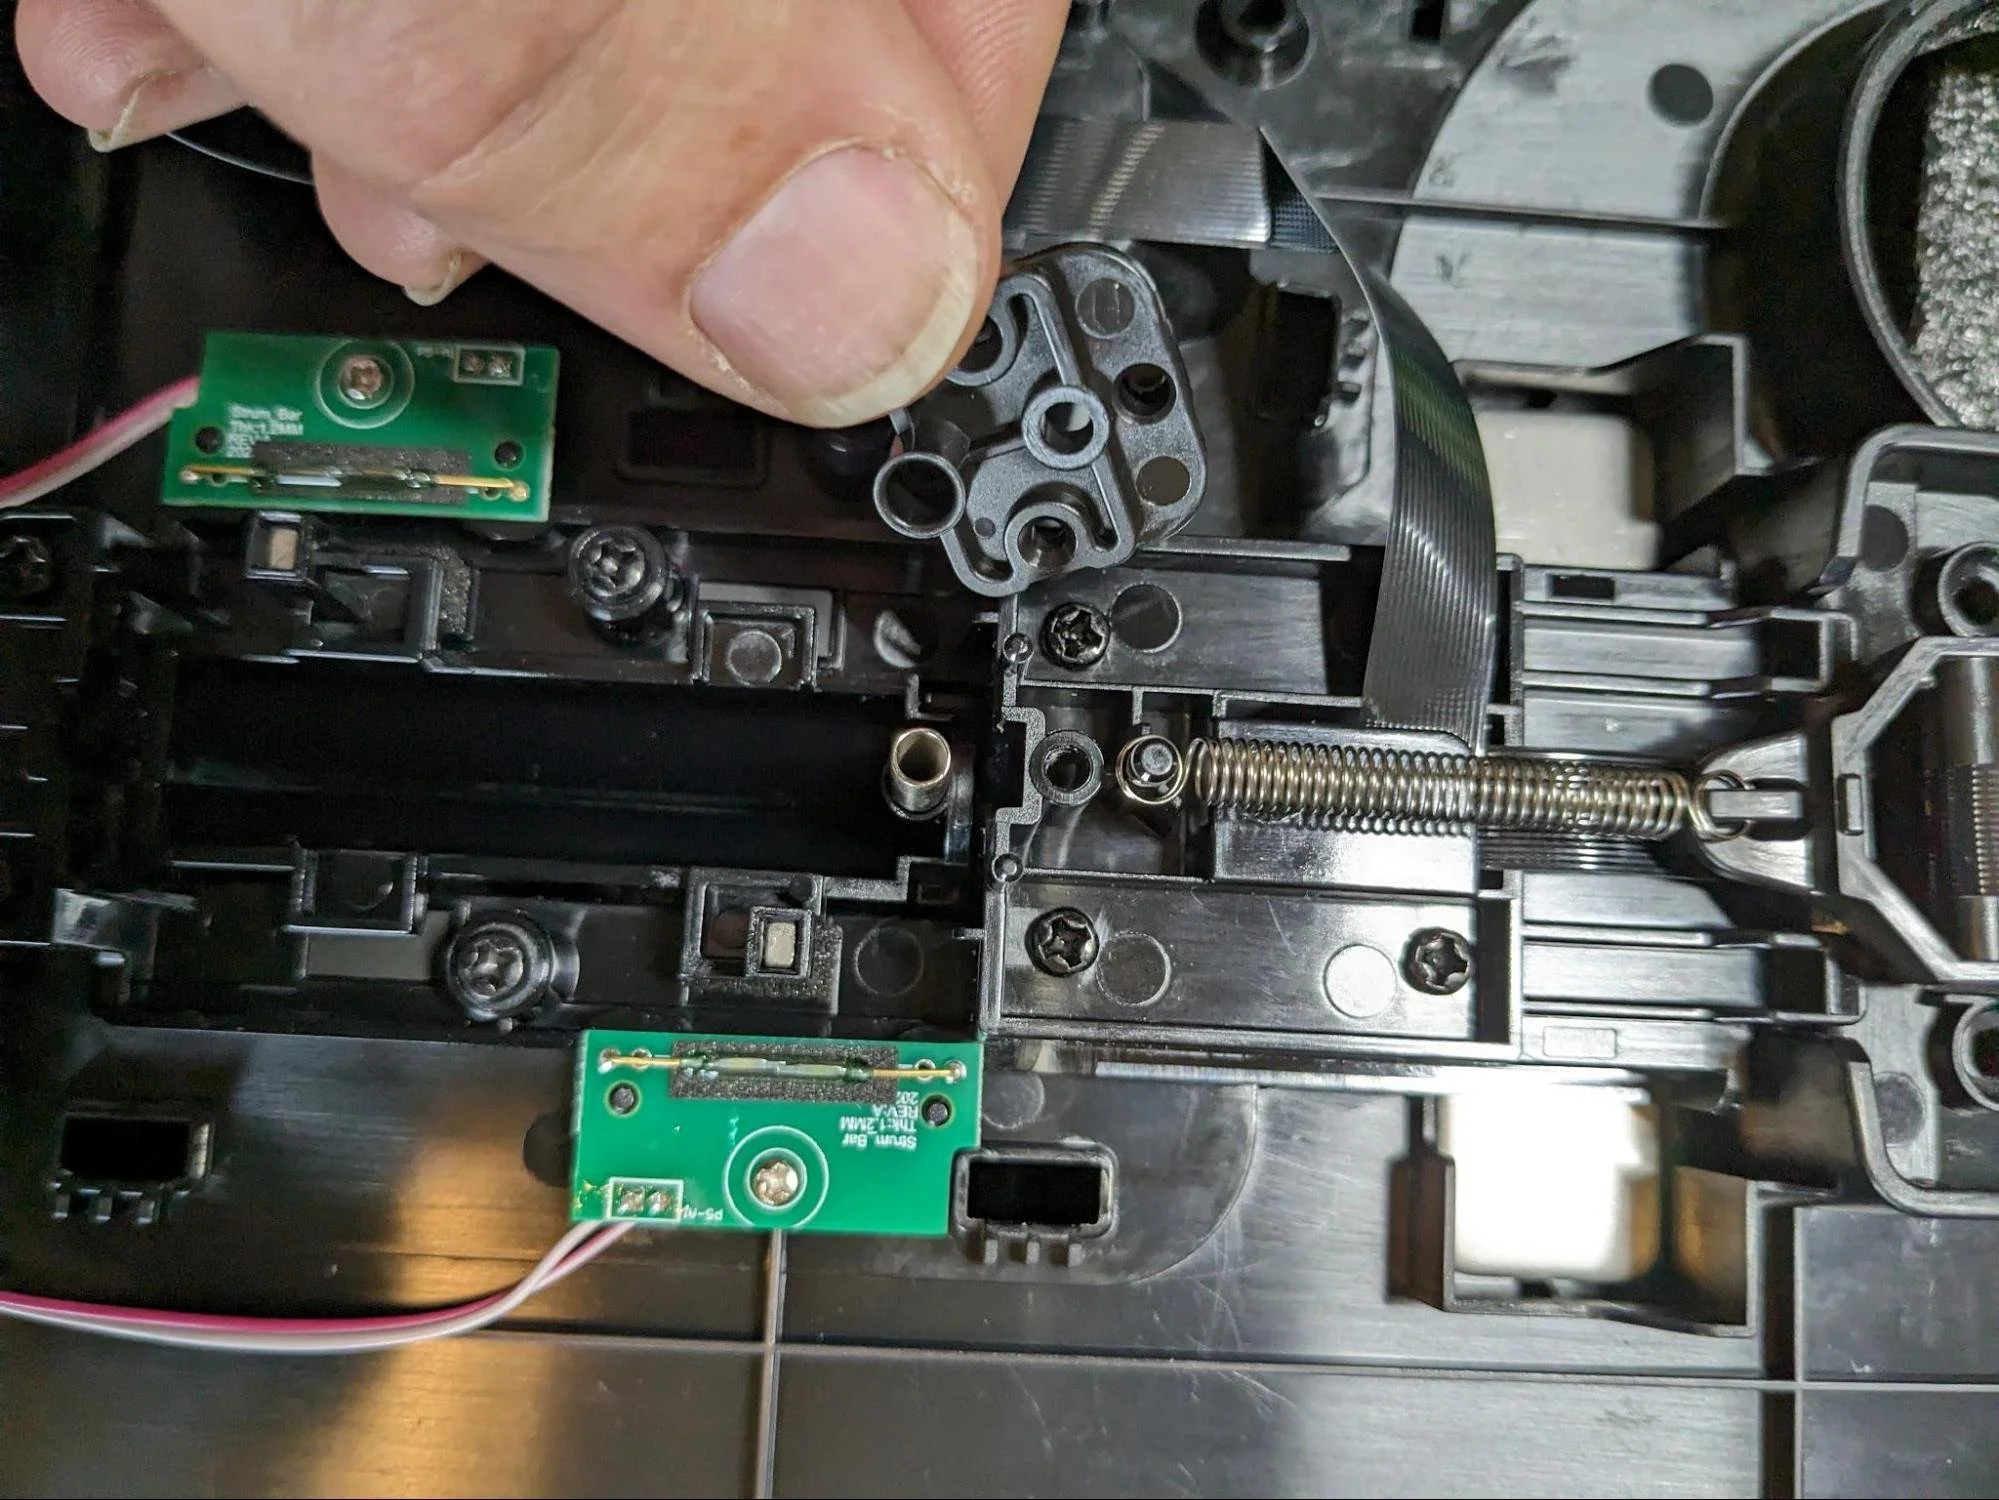
Removing ribbon cable spring bracket, exposing the tensioning spring (keep the spring and the screw that holds the bracket in place, you will need them later).
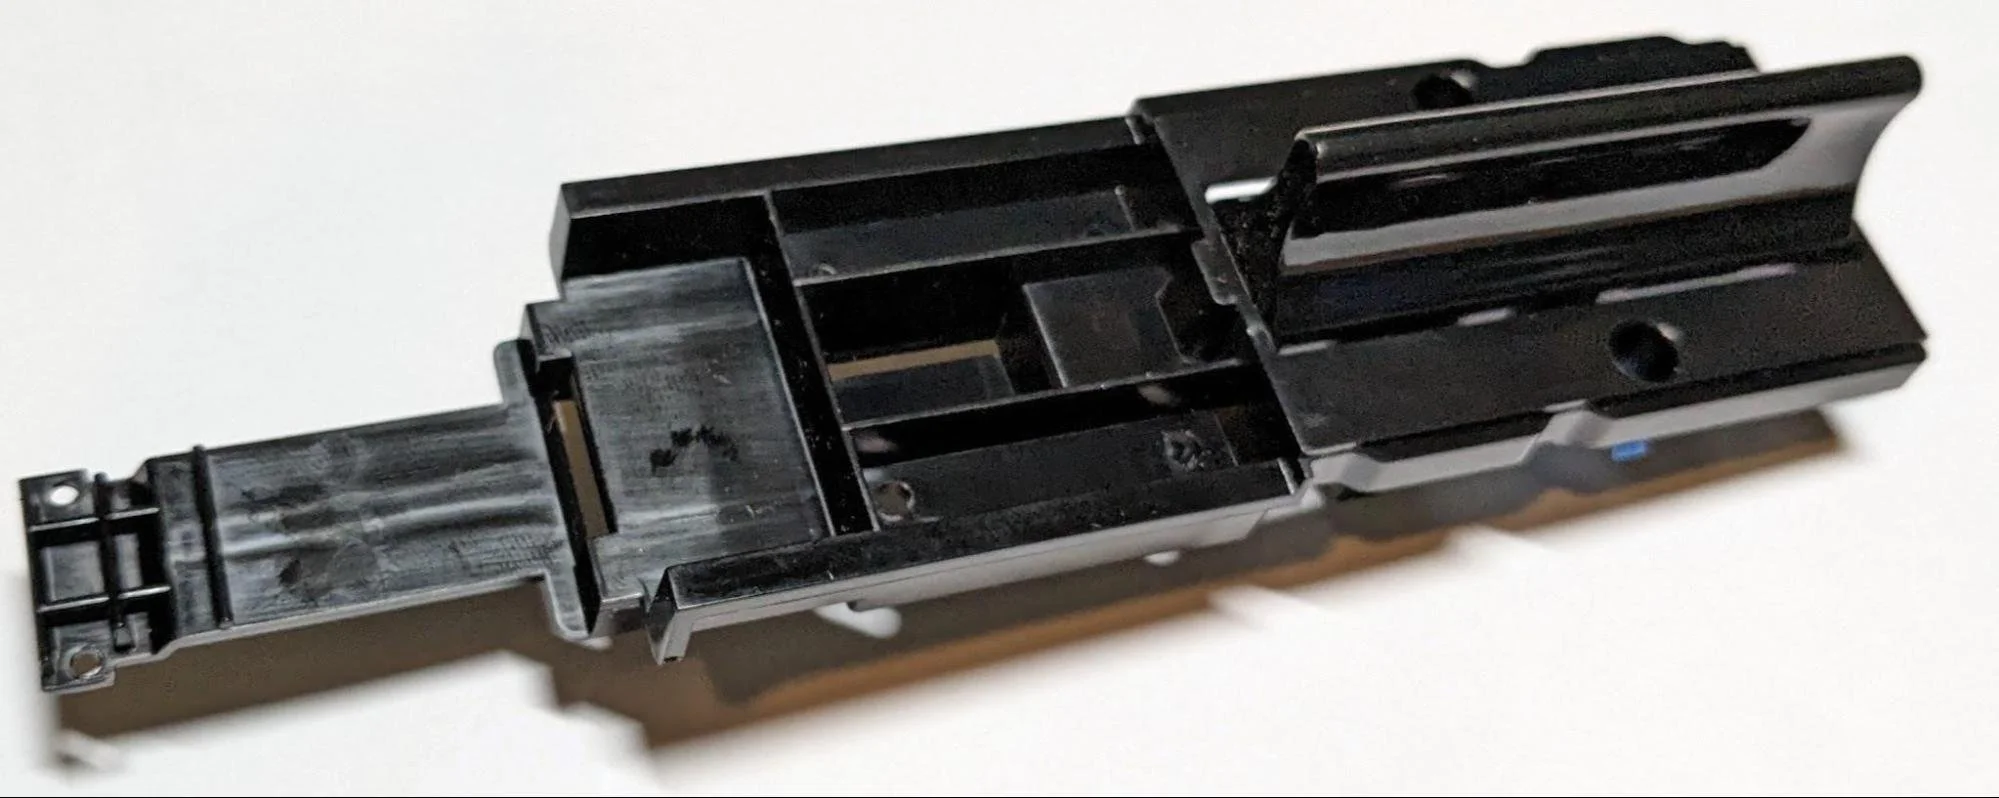
Original strummer assembly completely removed.
Guitar with original strummer completely removed. Keep the silver metal plate in place – it’s part of the folding mechanism.
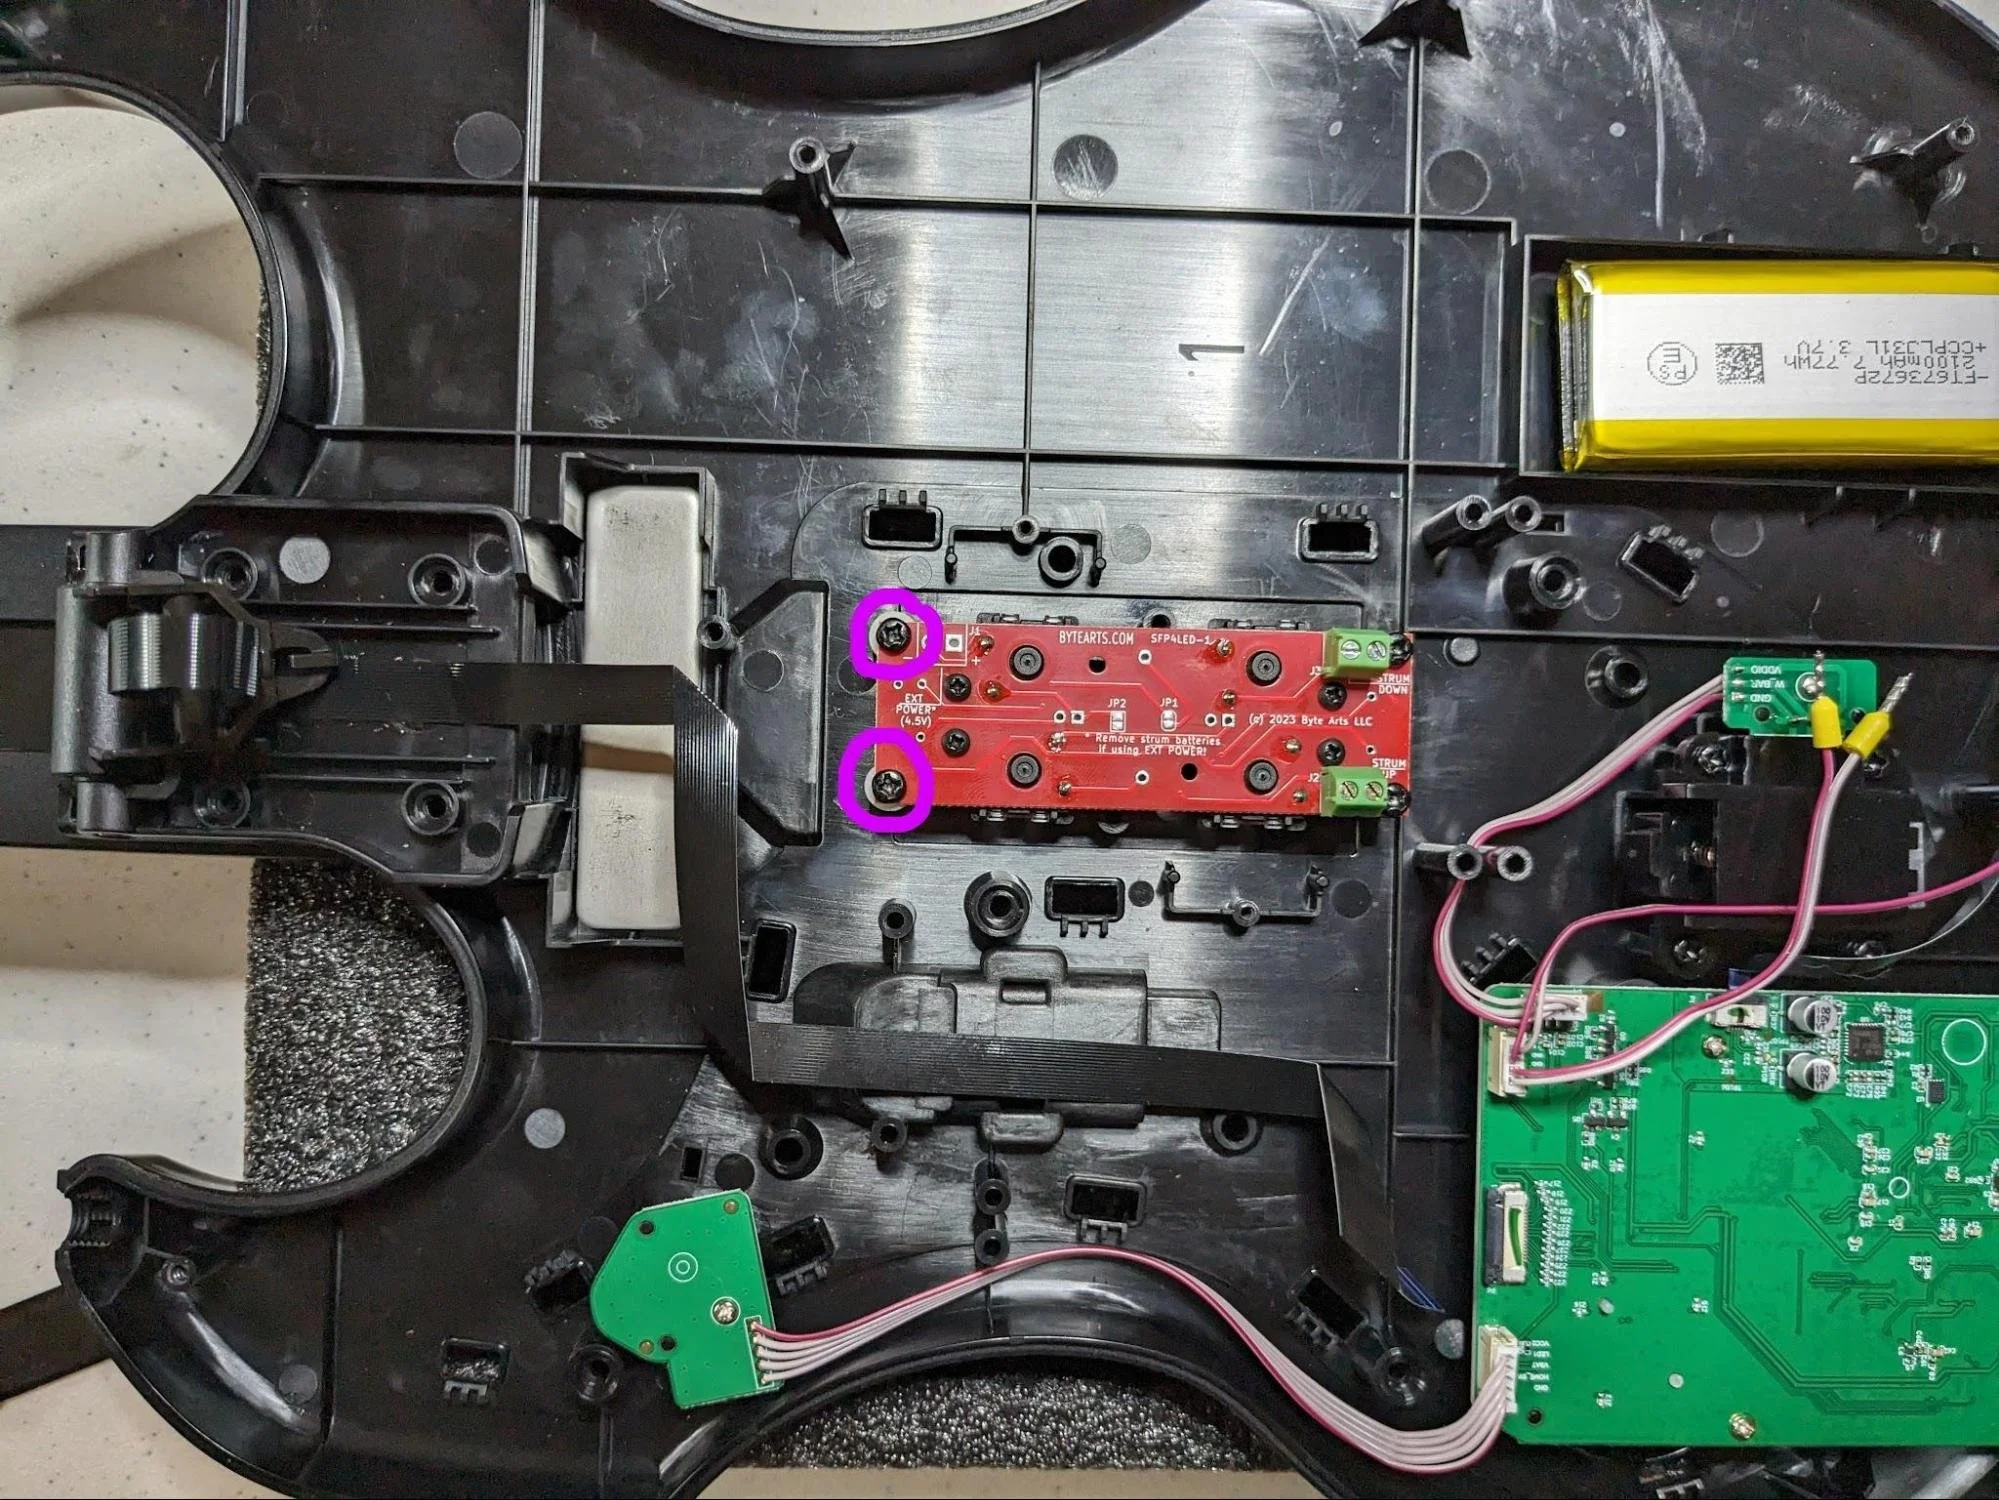
Step 3 - Install Strum Fix Plus and adapter
To install the Strum Fix Plus first place the two small cylindrical spacers over the two strummer screw mount studs that are closest to the neck and then install the Strum Fix Plus as shown in the photo below (the location of the spacers is circled). Do not over-tighten the screws or you may strip the threads – they just need to be snug.
Next install the rest of the RFMA adapter – it’s composed of two pieces, the main adapter bracket and then a flat cover piece for holding the ribbon cable in place.
You will also need to attach the tensioning spring to the RFMA adapter using the same screw that held the spring bracket in place earlier.
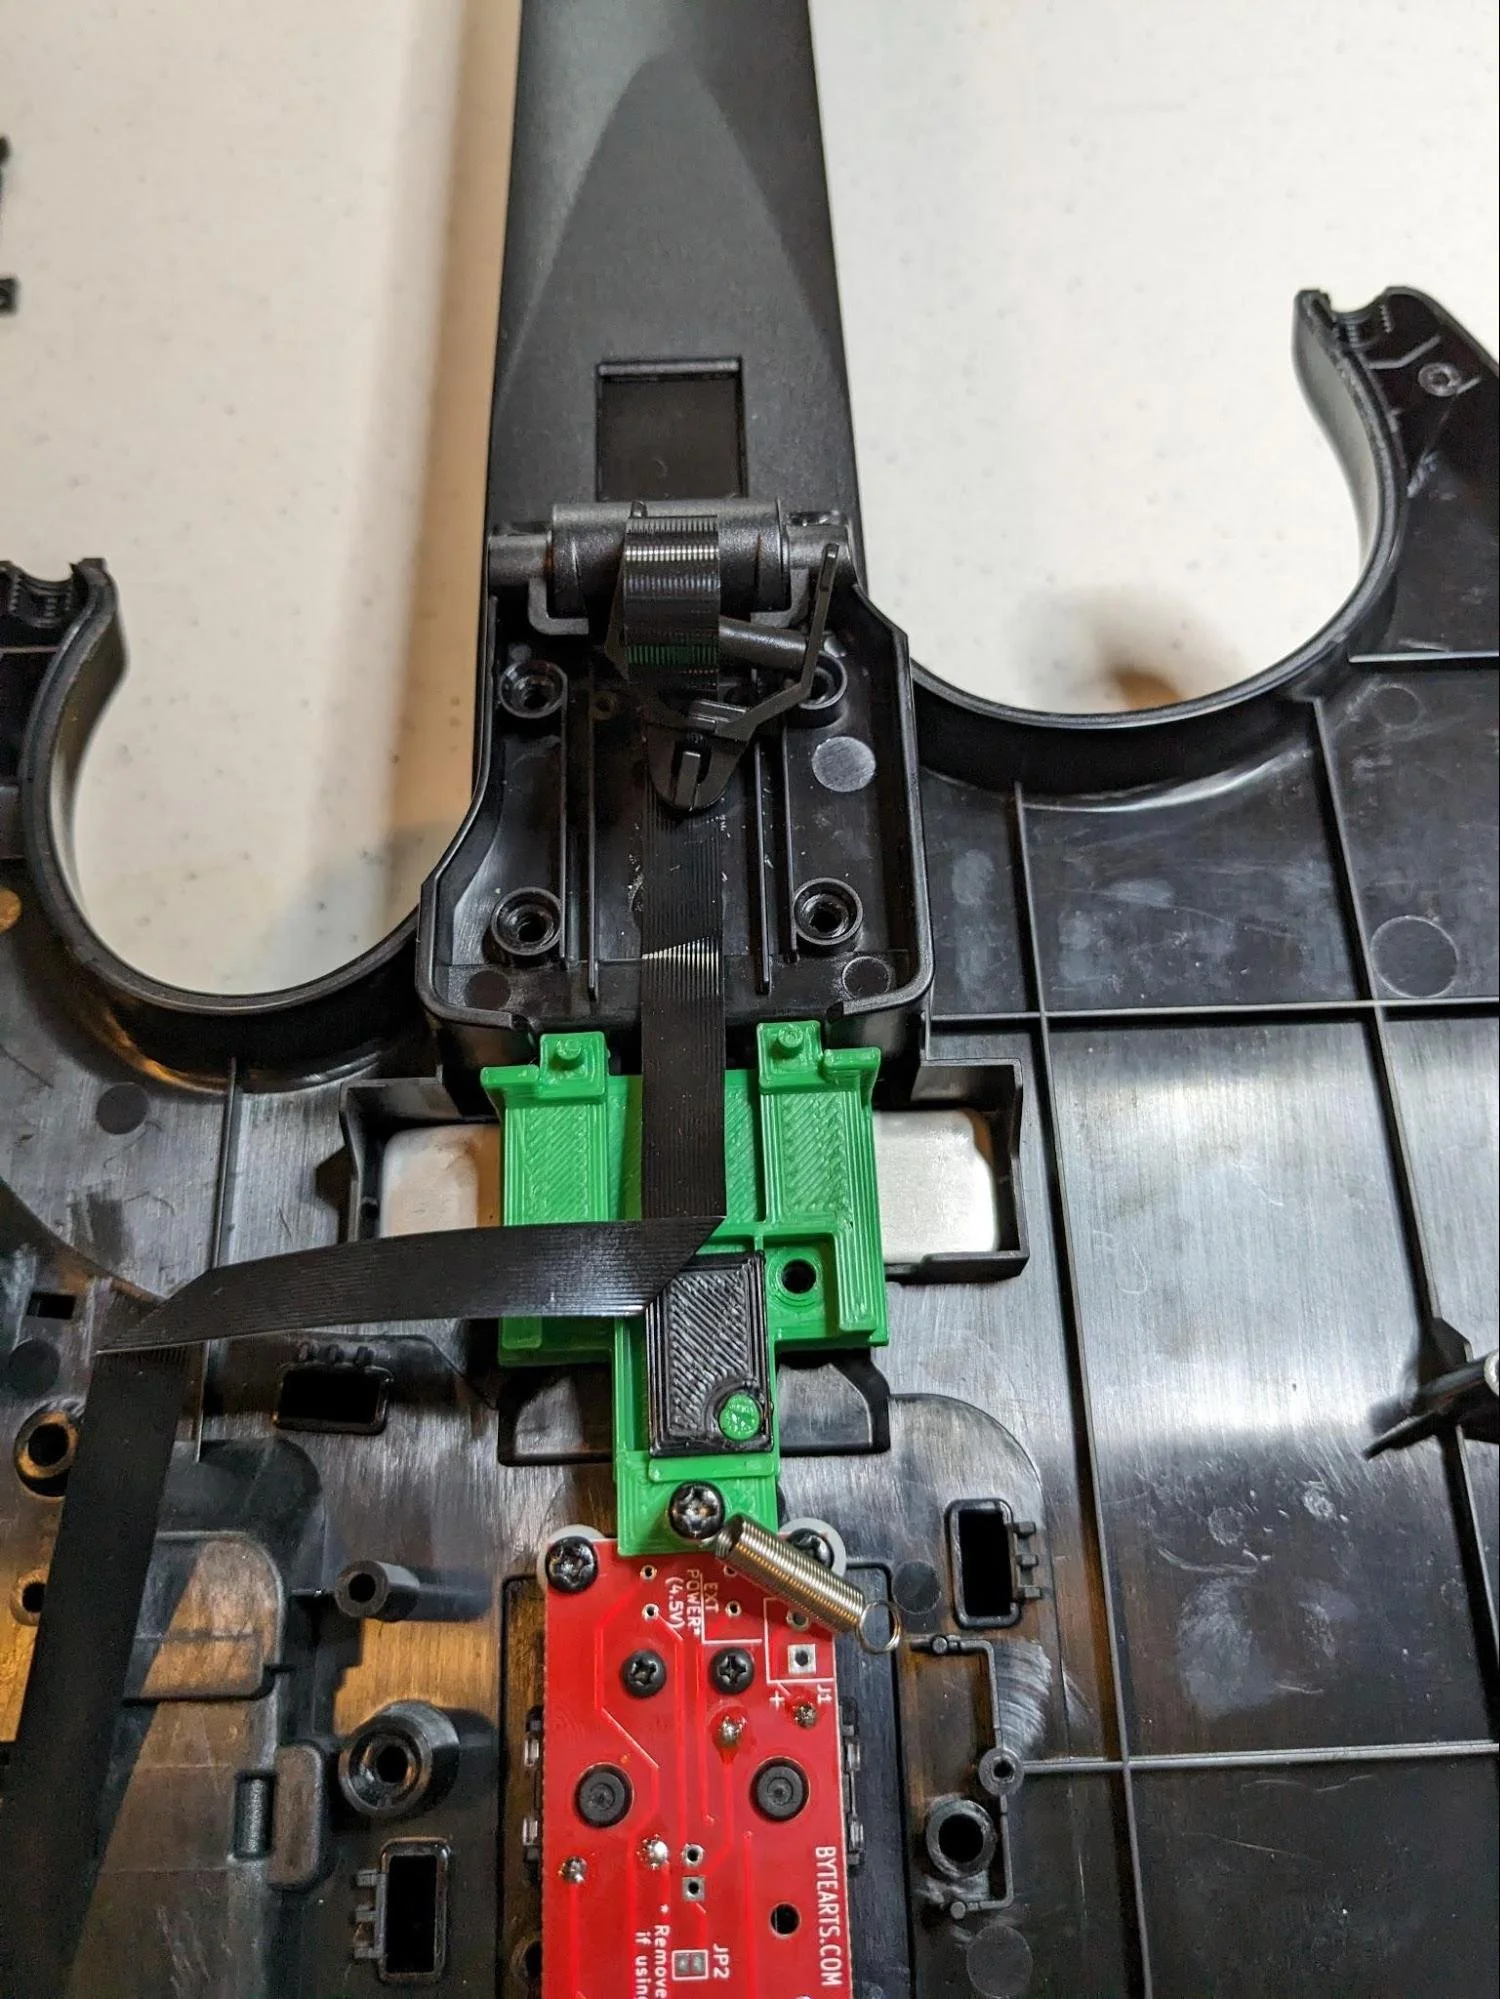
RFMA adapter body in place with one end of the tensioning spring attached with a screw - the flat cable cover is not installed yet.

RFMA adapter installed, including the flat ribbon cable cover. There are two small silver screws that hold the cover in place (seen near the top of this photo). The other end of the cover snaps in place over the studs on the main body of the RFMA. Be sure to tuck the ribbon cable underneath the small cover as shown in the photo. This keeps the ribbon cable from getting caught on the spring when the guitar neck is folded.
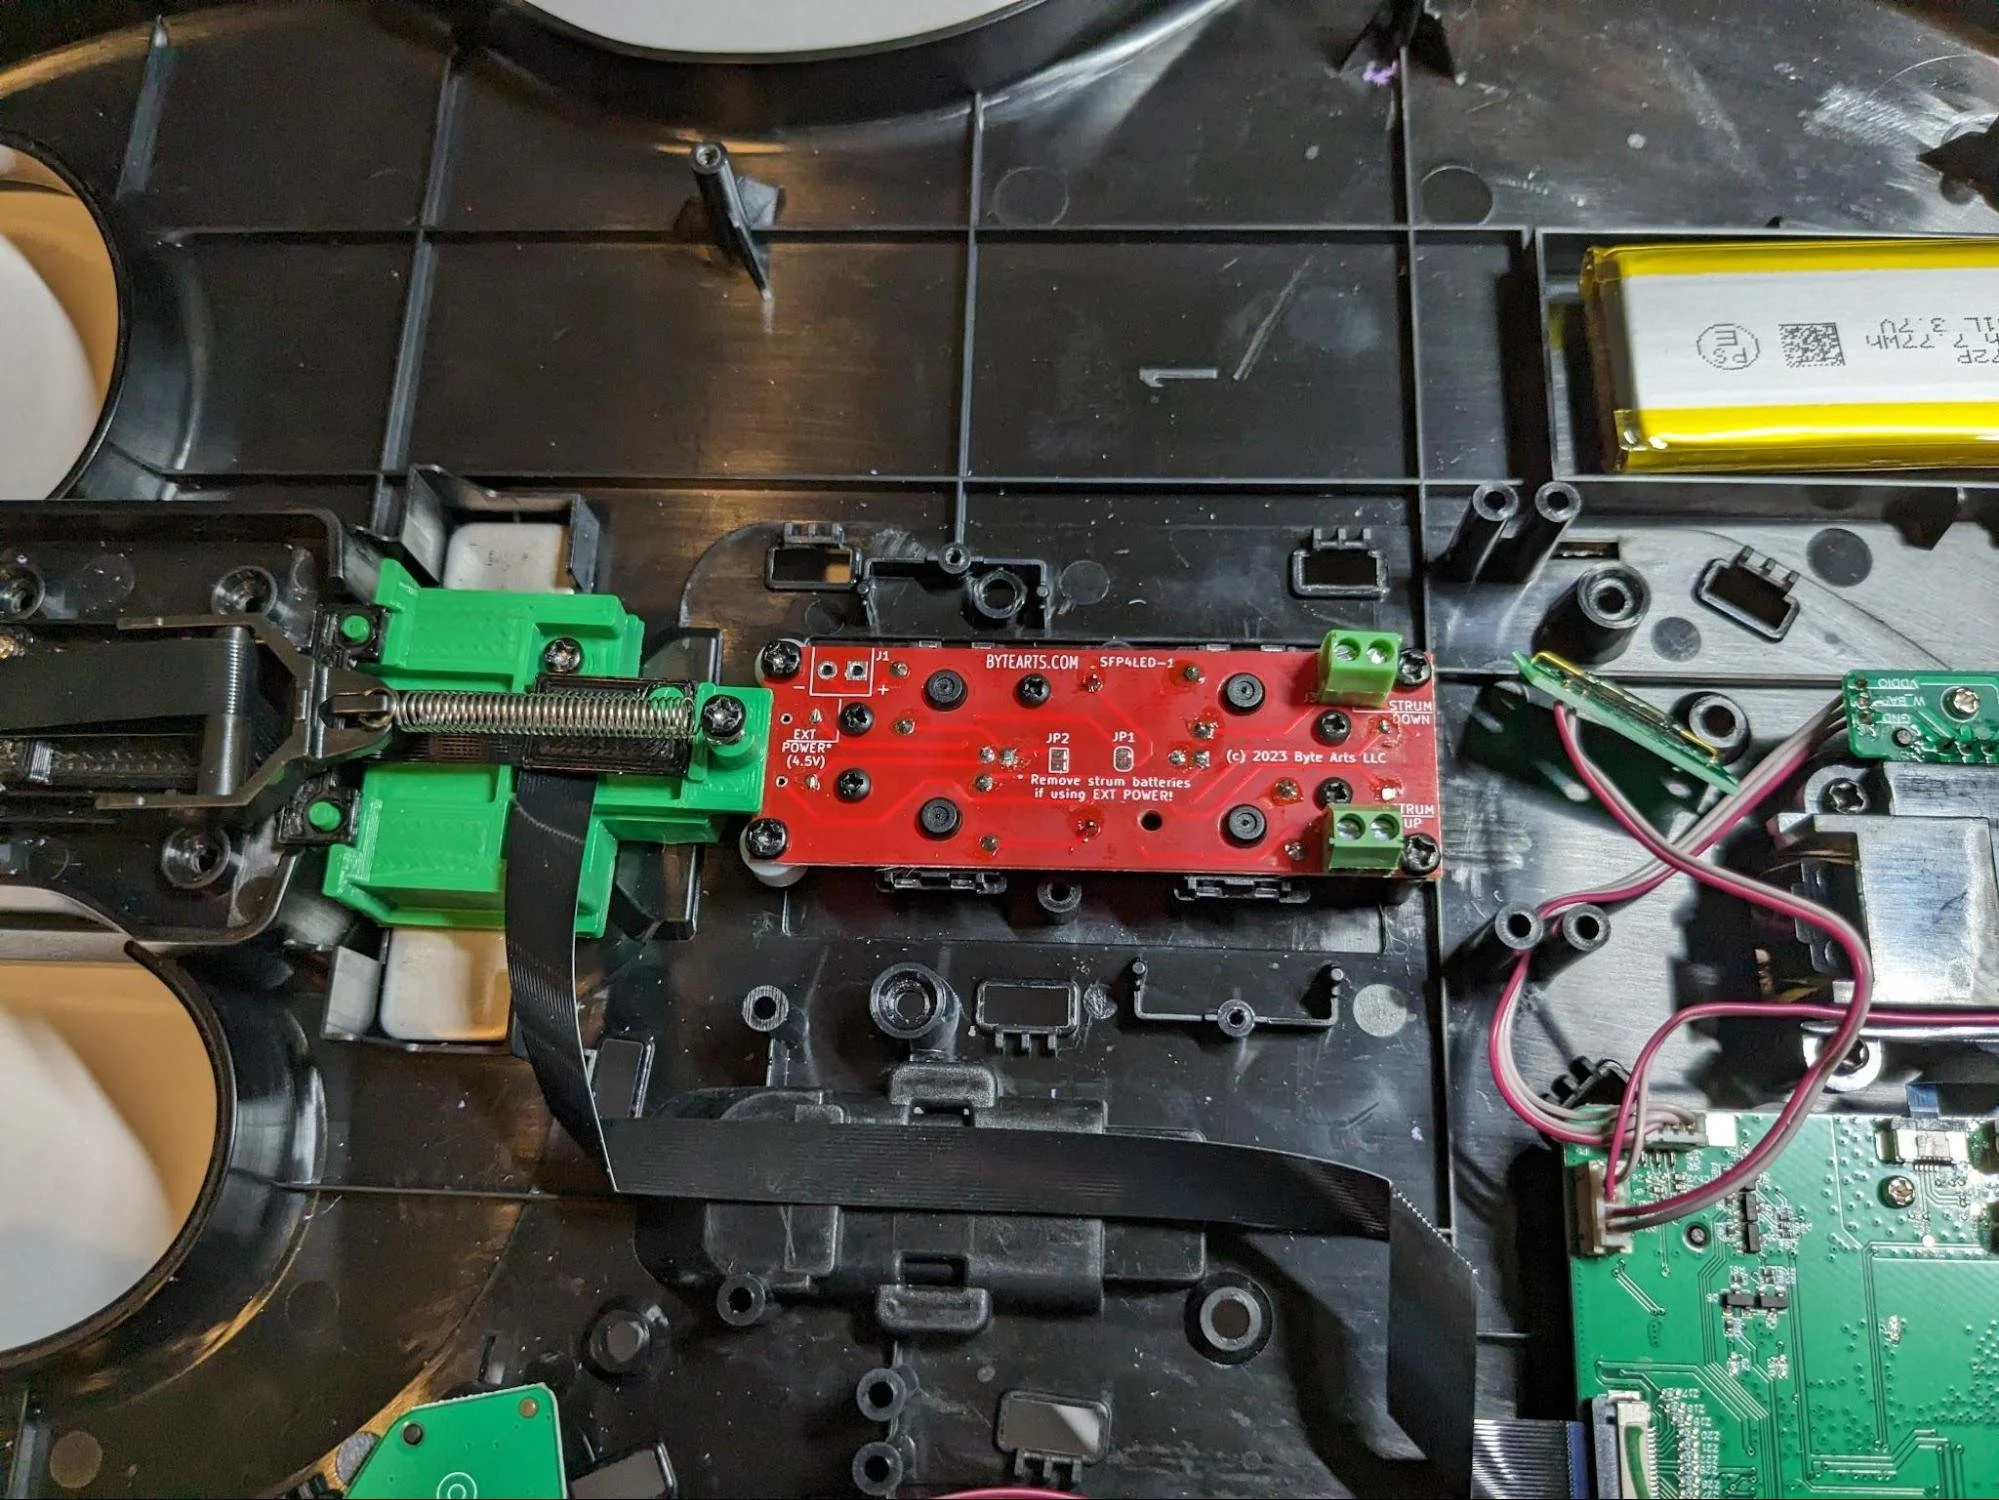
Install two screws in the holes in RFMA and snug them down to hold the adapter in place. Attach the free end of the tensioning spring to the ribbon cable tensioning bracket as shown in the photo and make sure the tensioning bracket is its slots and can slide freely.
You are now ready to connect the wires to the Strum Fix Plus.
Loosen the screws in the green terminals first in order to open up the terminals. Turn the screws counter-clockwise about 5-6 turns to fully open the terminals.
Strip the insulation back about 4mm from the end of the wires and insert the wires into the green screw terminals. The shorter wire goes to the terminal that is closest to the motherboard, the longer wire goes to the other one. It doesn’t matter which slot in the terminal the red wire goes into.
Carefully tighten the screws in the terminals – don’t over tighten them or you may break the wires, they just need to be snug.
Pull gently on the wires to make sure they are properly connected and don’t come out.
The Strum Fix Plus is now installed and ready to test.
Step 4 - Test
Before reassembling the guitar it’s recommended that you test it. Connect the guitar to your console or PC and use the software/game that you normally use to check the operation of the guitar and strummer.
Step 5 - Reassemble the guitar
Put the two halves of the guitar back together and reinstall the screws you removed in the first step. Be careful to get the ribbon cable tensioning bracket in place when putting the two halves together.
Don’t forget to check that the guitar strap studs are in place. Once all the screws are installed and tightened (remember they just need to be snug and don’t over-tighten them) you can reinstall the pick guard - line up all the tabs and push it into place.
You are now ready to rock!